Using Discussions in a Course
Discussion Modules enable interaction between students and instructors by allowing the instructor to post a discussion topic, which students can respond to with comments. Students can also engage with each other's replies, fostering a focused group discussion rather than a lengthy forum thread. This approach encourages group communication and thoughtful exchanges on the topic.
Discussion Modules can also be used for grading, with the option to set a minimum number of comments a student must submit for the module to be considered complete.
This guide will cover how to create a Discussion Module, add it to a Course, explore the student experience, and evaluate discussion comments as an instructor.
Discussion Modules must be added to a Course, and can only be used by Students enrolled in that Course. They cannot be operated as standalone forums.
In this article
- Creating a Discussion Module
- Adding a Discussion Module to a Course
- Student Experience of Discussion Module
- Evaluating Student Discussion Comments
Creating a Discussion Module
Now that you know what the purpose of a Discussion Module is, let's go through how to create one.
-
From the Admin Dashboard, select Courses, then Discussion under the Modules header.

-
Click on Create Discussion Module
-
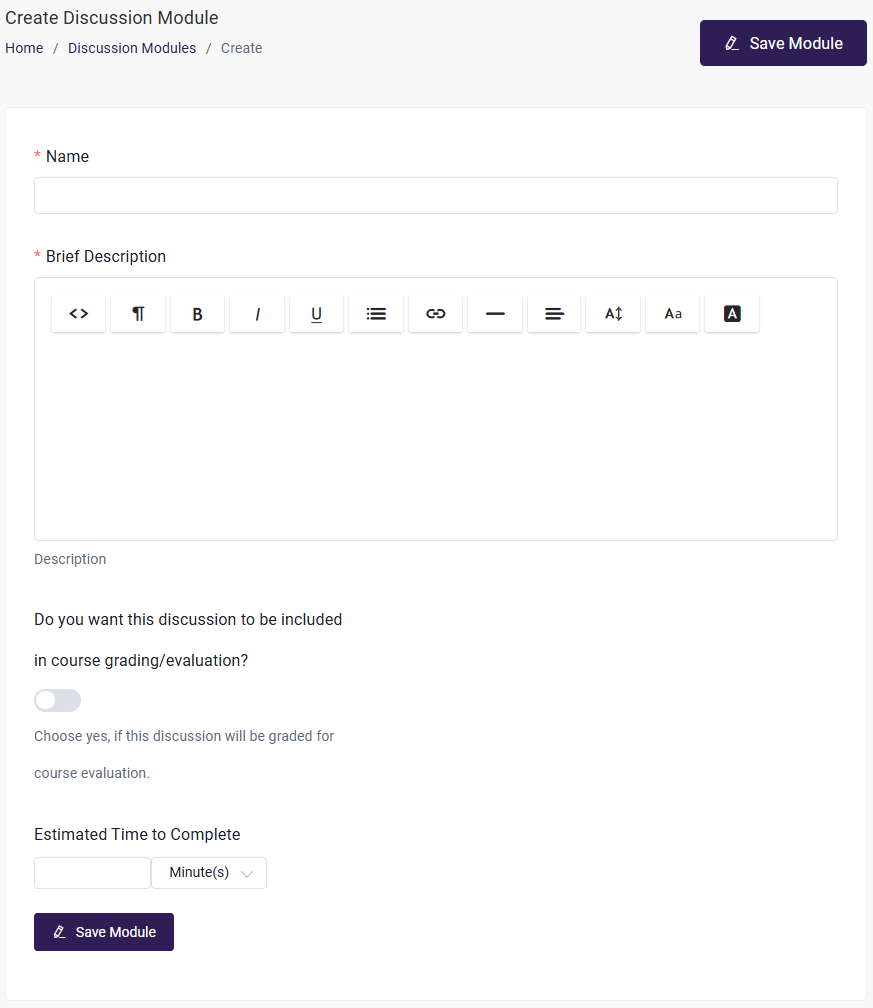
Enter the Name of this module
-
Add a Brief Description: The Brief Description area is where the Course instructor poses a discussion topic for the students to review. A student cannot post their own discussion topic.
The text editor does allow for content formatting, as well as custom HTML to make it look and feel however you'd like. You can even embed images, videos, or social media posts to enhance your discussion. -
Set Discussion Grading: Once your discussion topic is in place, you can set your grading options for the Module. You can set the maximum points value for the topic, which you can use to evaluate your student's response.

- There is also an option to include the discussion in the overall grading of the Course. Selecting yes will add this discussion to the other Quiz, Assignment, and SCORM Modules that will be averaged together to give a student their final grade for the Course.
- If you choose to include the Module in your grading, you will have the option to set a minimum number of comments made by the student before the Module can be marked as completed.
- If the module is included in grading, the discussion response will be included on the Pending Submissions area of the Admin Dashboard for you to evaluate
-
You can set an estimated time to complete the module, which indicates the ideal amount of time required to finish it.

-
On the user end, it will be displayed like this.

-
Save Module when you're done.
Then, we want to make sure the module is made available in a course. Once the module has been saved, you can add it to a Course using the steps below.
Adding a Discussion Module to a Course
Now that your module has been created, you can add it to the Course or Courses so that it is accessible to students:
-
From the Admin Dashboard, choose Courses, then All Courses
-
Find the Course you want to add the Module to, and click the three-dot action menu. Select Edit
-
Click the Step 2: Curriculum tab
-
Click "Add Module" and then opt to "Select an existing module from the list"
Search the drop-down menu for your Module name, and select it.
Once the Module is added to the bottom of your course list, you have the option of entering the Edit Module page to make changes to its content or removing the module from the course.
-
Click and drag the modules to rearrange them in the order they should be presented in the course. This involves placing the modules in a suitable order along with the sections if used.
-
You have the option to:
Lock the Module, which forces a student to complete it before being able to move on to the next module in the course
Set the availability of the Module, which allows you set a date when the module will be available to a student. This gives an Admin or Instructor the control to make modules available to students over time or to restrict a student from completing the course too quickly.
You can also set a minimum amount time spent in the module that the student must abide by in the Module before being allowed to move on to the next module.
-
Save your course changes by clicking Update Course in the upper right corner. If you get distracted or navigate to another section of the platform, changes may not be saved if you do not update before leaving a page you have made changes to.
Please see this guide for the full details of Creating and Updating a Course.
Student Experience of Discussion Module
Let's go over what students will see in the Discussion Module of your Course.
-
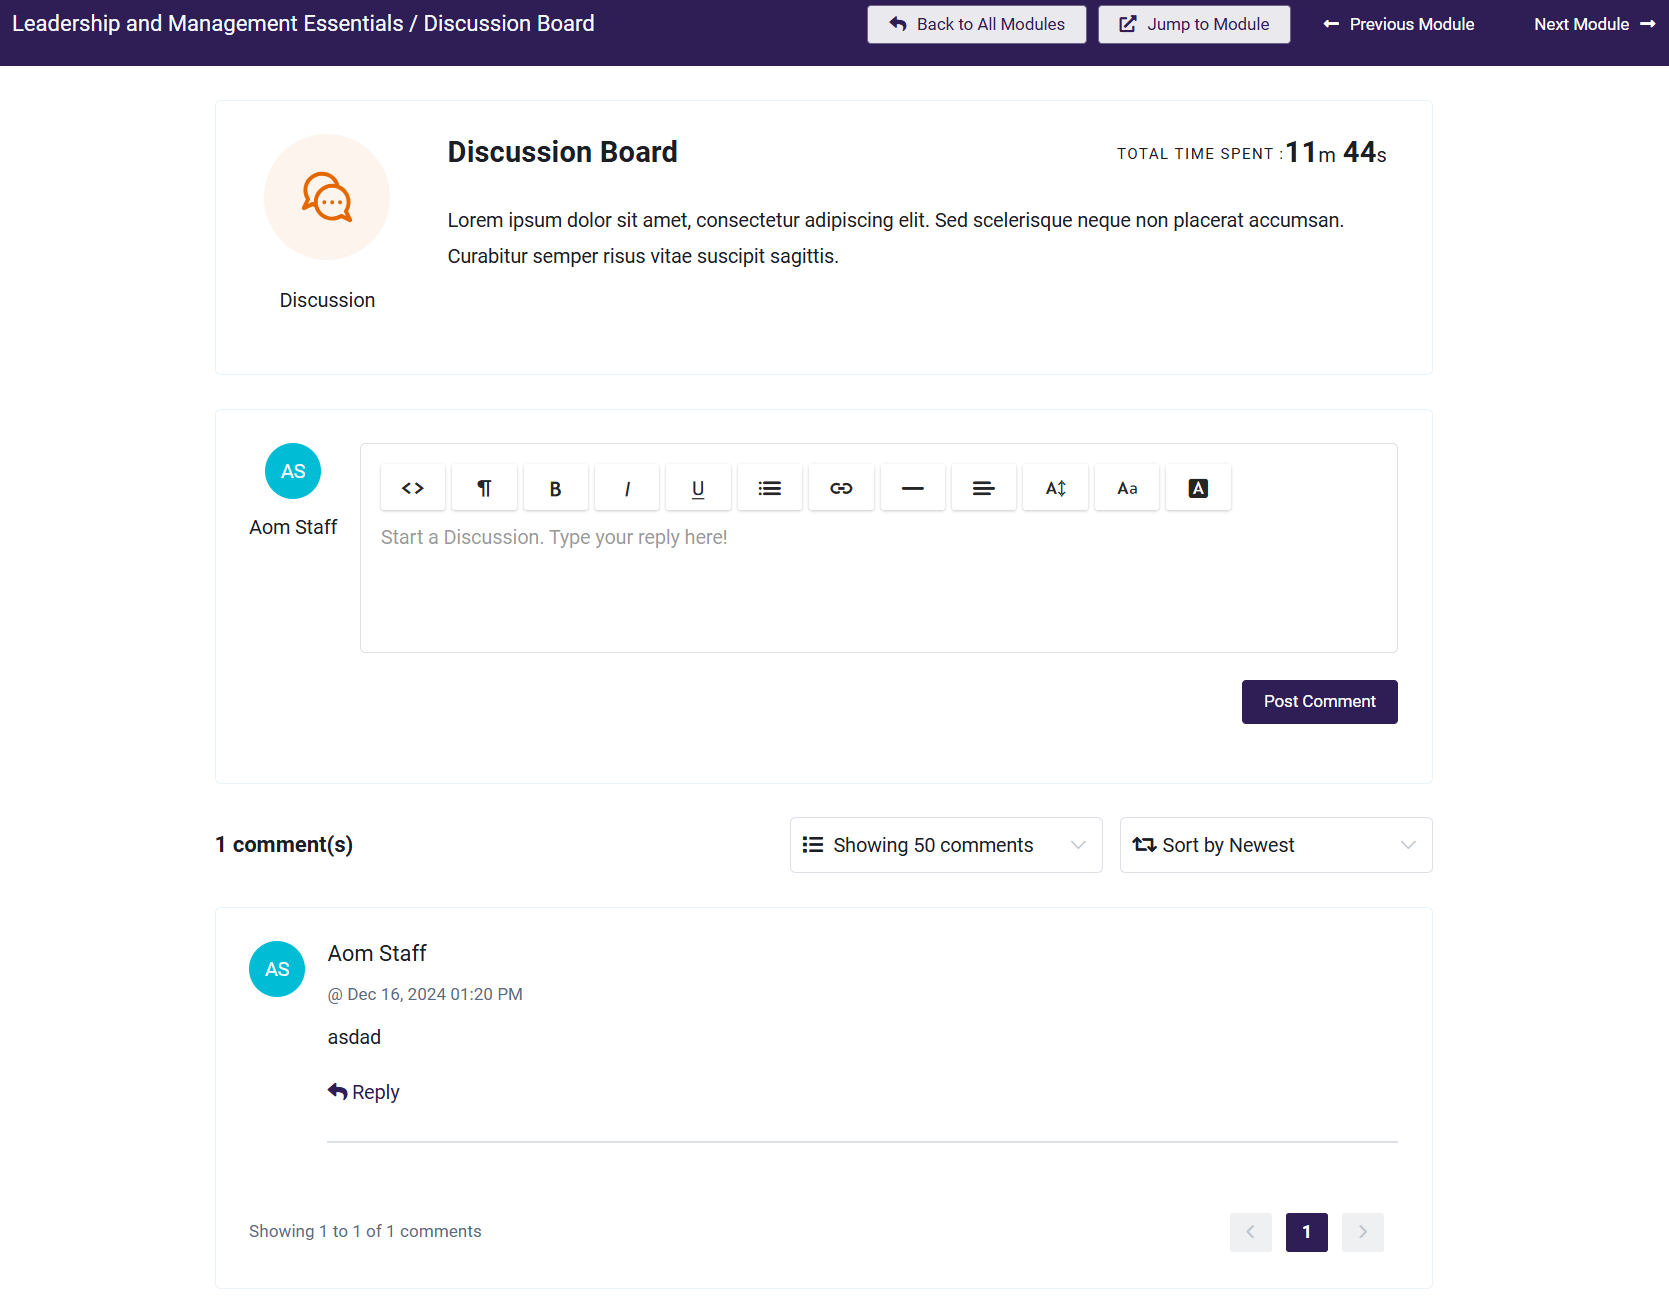
Inside the module, the students will see the discussion topic, as well as other responses from students. They can create their own response and then click Post Comment to have it posted for others to read and for you to evaluate.
-
At the bottom of the Module is the Comments area, where all of the comments made by your students will be shared publicly. Students will have the option to both comment on the instructor's topic as well as reply to each other, as all comments are visible to everyone in the Course.
-
Once students submits the comment , the instructor will be notified through email.
Discussion Submission: When a Student has submitted a comment in a Discussion module, the author (either an Admin or Instructor) of the Course is alerted.
To enable this email setting, please refer to the documentation.
Evaluating Student Discussion Comments
Once a student submits a response on the Discussion Module, you'll be able to evaluate their response if you have set the module to be graded. When viewing the submission, you will see the name of your Module, the original discussion topic, and your student's comments.
-
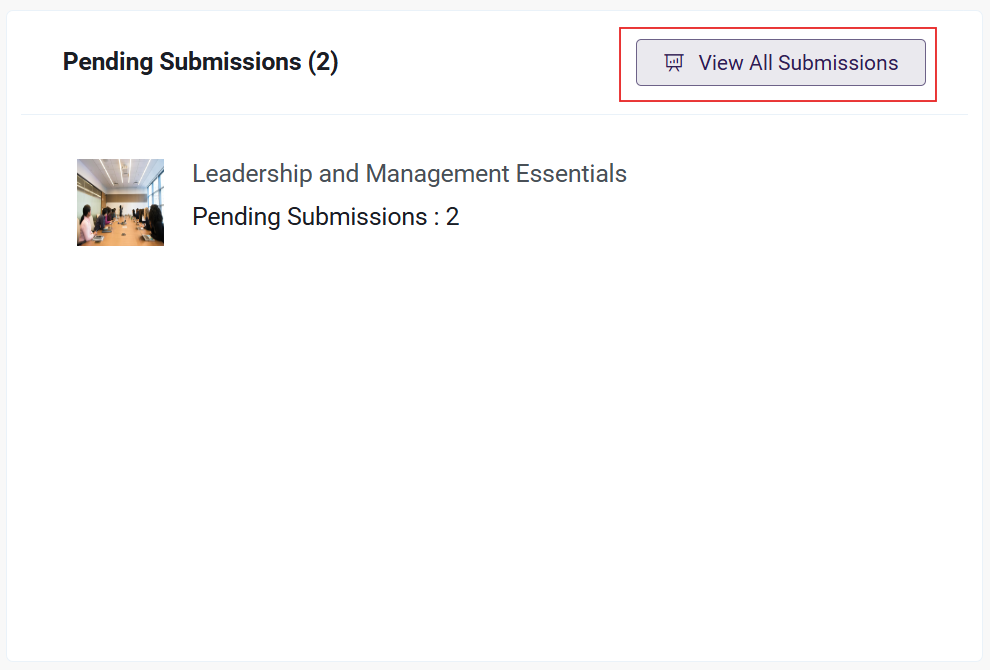
When a student submits a discussion response for a graded module, it will be displayed on your Admin Dashboard and you will be notified via email.
-
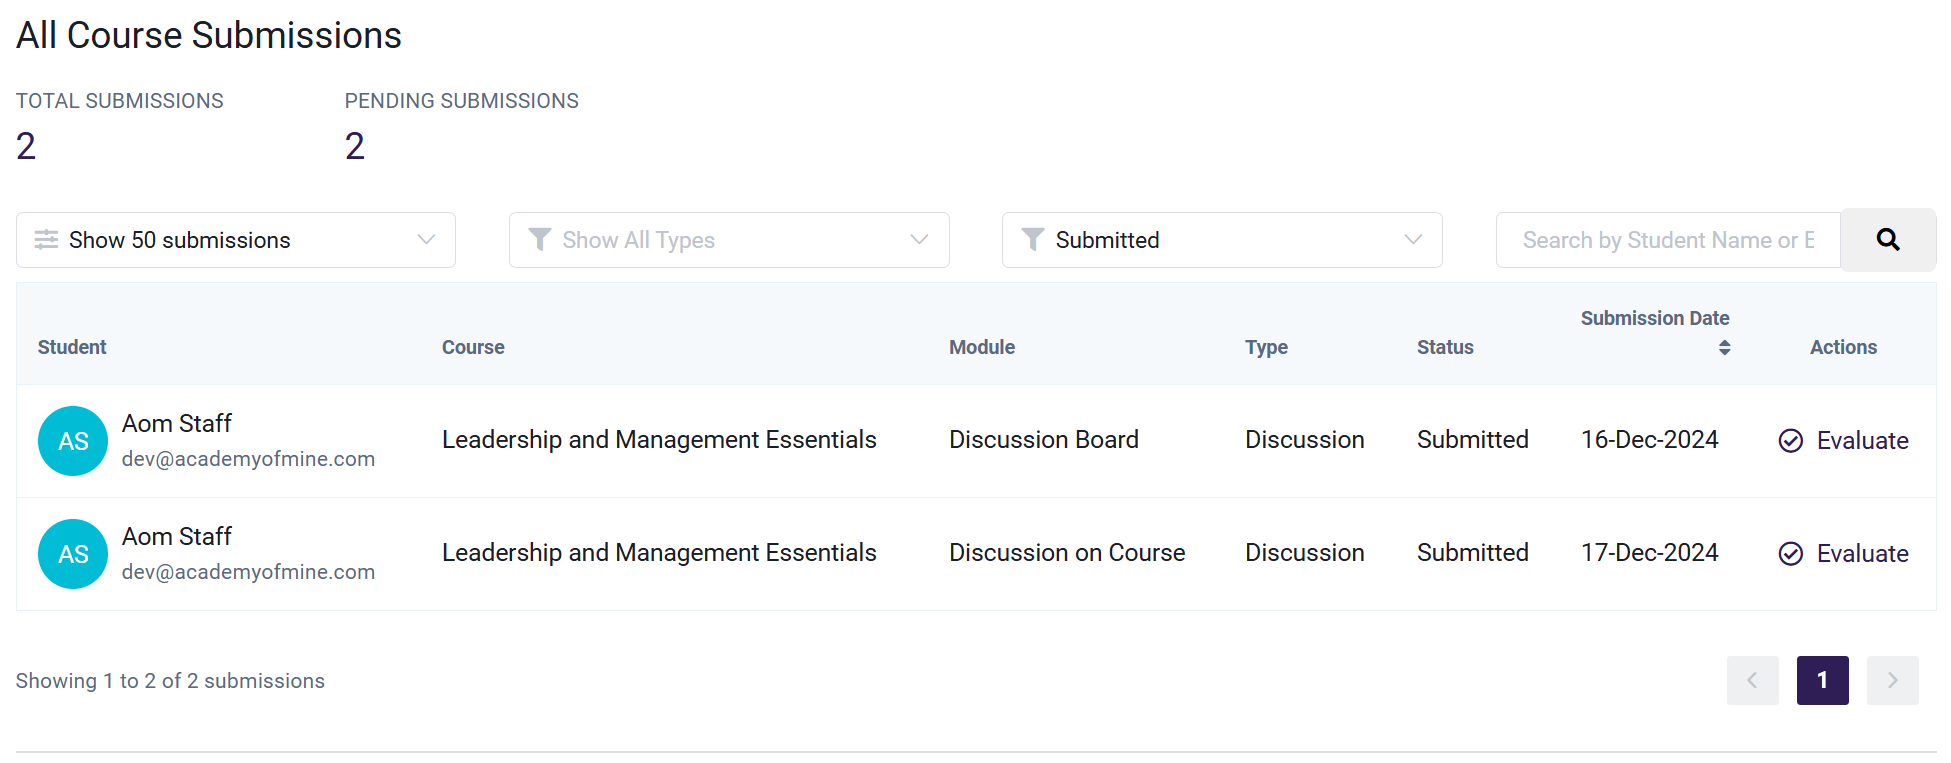
Click on View all Submissions to access a list of all pending submissions across all courses it includes both assignments and discussions. You can filter the list by type (Discussion or Assignment) or search for a specific student by name.
-
Once you've located the course you want to evaluate, click Evaluate under the Actions column.
-
Read the student's comments, enter your response, and award a point value.
-
Click Evaluate Discussion.
-
You can also view all Discussion submissions for a specific Course by going to the Admin Dashboard, select Courses, then All Courses
Find the Course you want to evaluate and click the three-dot action menu. Choose Submissions. You are then able to see all Pending Submissions for that Course, and are also able to filter by Type (Discussion or Assignment) and search by student name.
-
When a discussion is submitted by a student, the instructor will be notified via email.
Discussion Submission: When a Student has submitted a comment in a Discussion module, the author (either an Admin or Instructor) of the Course is alerted.
To enable this email setting, please refer to the documentation.