Navigating the Checkout Process
If your courses are available for purchase online as products, users will complete the checkout process to purchase and gain access to the course or enroll in an instructor-led class. The checkout process is initiated when a prospective learner is ready to purchase a product through the course catalog. This process also applies to free products; however, no payment will be required, and learners will not need to enter payment details. Additionally, representatives of organizations or groups have the option to purchase course seats in bulk, if needed.
In this article, we'll be going through how a user can browse the Course Catalog, go through Checkout, and how they can then access the Course. We'll show what it looks like to a user checking out as an individual, as well as what the checkout process looks like if a user is purchasing seats in bulk for a portal. Then we will review the emails that go out after a purchase and the ways you can customize the checkout pages.
Be sure to review our overview of eCommerce Setup guides: Introduction to eCommerce as well as Introduction to Portals if you are interested in how an organization can manage users and courses they purchase.
In this article
- Checking Out as a Single User
- Checking Out as a Portal/Bulk Purchasing
- eCommerce Emails
- Customize Checkout Pages
- Next Step
Checking Out as a Single User
The first step to purchasing a product is browsing the course catalog, which contains a list of your available products.
Be sure to review our guide to Building a Course Catalog.
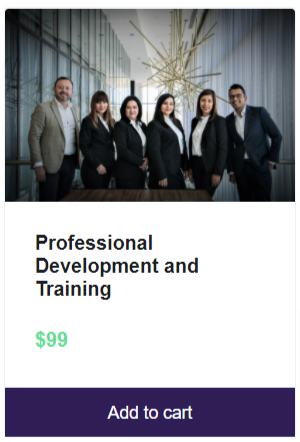
- Potential Learners can browse through your Course Catalog listings to find the Course they want.
If you offer instructor-led courses, those types of products will need to have their own catalog page--please see here for more details. Also, note that instructor-led courses may not be available to legacy users. Please contact support if you have questions about the availability of this feature and adding it to your platform!
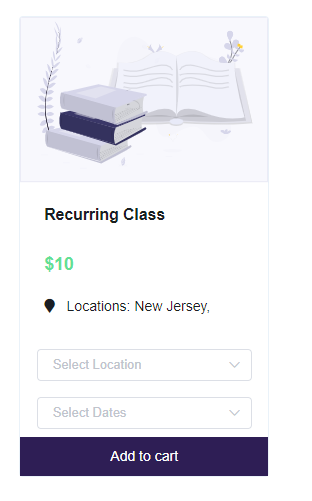
- When they find the Course they want, they select Add to Cart.
For Instructor-led course-based Products, the learner will be required to select the location and date/time of the class they would like to enroll in before they can add it to their cart:
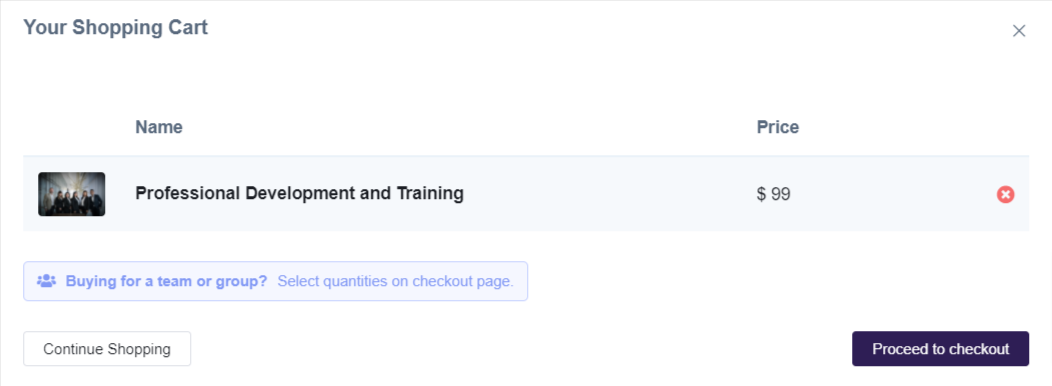
- On clicking Add to Cart, the shopping cart popup appears which has options to continue shopping or proceed to checkout.
- On clicking Proceed to Checkout, learners will be redirected to log in(if not already logged in) with an option to create a new account before heading to the checkout page.

- Once they have logged in or created an account, Learners will have a chance to review the contents of their shopping cart:
- In the case of a free Product, Learners can proceed to place their order.

- If coupons are enabled, the coupon code can be applied before the payment is made.
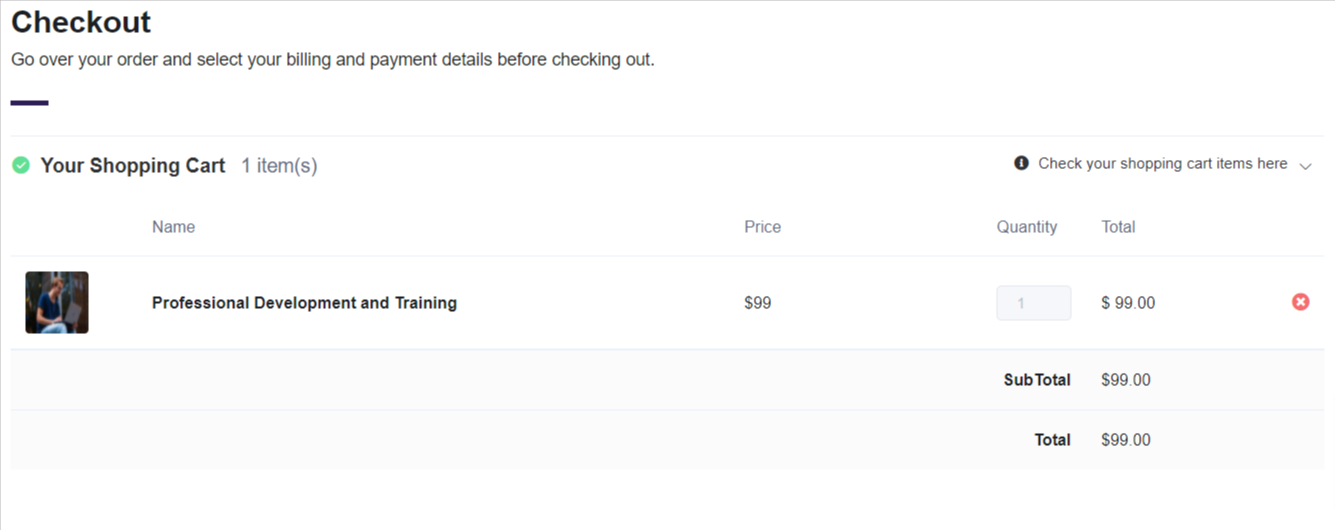
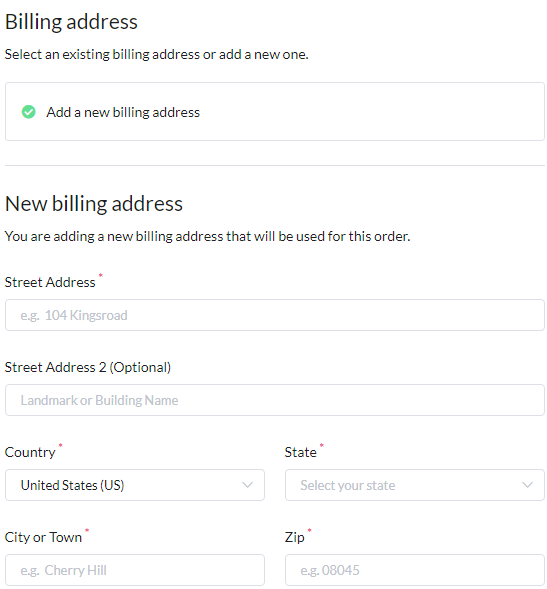
- For a paid Product, billing information must be entered. If a learner has their address saved in their account settings, these fields will auto-populate. After a purchase has been made, this address will be saved in the Learner's account settings.
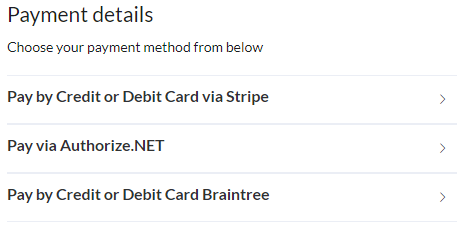
- Credit card information is entered next. Stripe, Authorize.net, and Braintree by PayPal are the payment platforms available for integration. It is possible to use more than one, or all together if you wish. The learner would be allowed to choose their own checkout method at the time of purchase.
- When the purchase is complete, the learner will be redirected to the Thankyou Page(which can be customized from All Pages Section) which contains a link to view the My Courses section.
To view details for instructor-led courses, they will toggle to Instructor-led and will be able to view their upcoming classes and any associated study materials.
Checking Out as a Portal/Bulk Purchasing
Portals allow you to sell course seats in bulk to organizations or institutions and delegate the learner management to a representative of that organization (for example a manager in a company overseeing the education of his employees). While you (the Admin) can create a Portal on your end, Portals can also be created by the representative purchasing seats via the Course Catalog themselves, requiring little involvement from your end!
Essentially, the representative will select to purchase more than one quantity of a Course, and will then be prompted to create an account--they'll enter the company name, and the user purchasing the seats will become the Portal Admin. Once the seats have been purchased, they'll be able to enroll learners into those course.
For a more details walkthrough on how Portal Admins purchase several seats, please see this article.
eCommerce Emails
When a purchase has been completed, automated emails will be sent to both the new Learner and the Admin(s) of the account.
Admins have the option of setting up and receiving emails for the following order notifications:
- New Order
- Failed Order
- Pending Payment
- Refunded Order
- Failed Subscription
Students will receive a Primary Recipient version of the New Order email when they complete a purchase. The account Admin or any other CC'd addresses will receive an Other Users to be Notified version of the New Order email when a new purchase is completed.
The eCommerce email settings can be found in the Admin Dashboard under Settings, then Emails. Then choose eCommerce.
For more information on automated eCommerce emails, please review our guide: Automated eCommerce Emails
Customizing Checkout Pages
It's possible to customize the Cart page, the Checkout page, and the Thankyou page.
- These pages can be found in the Admin Dashboard by going to Pages & Menus, then Pages
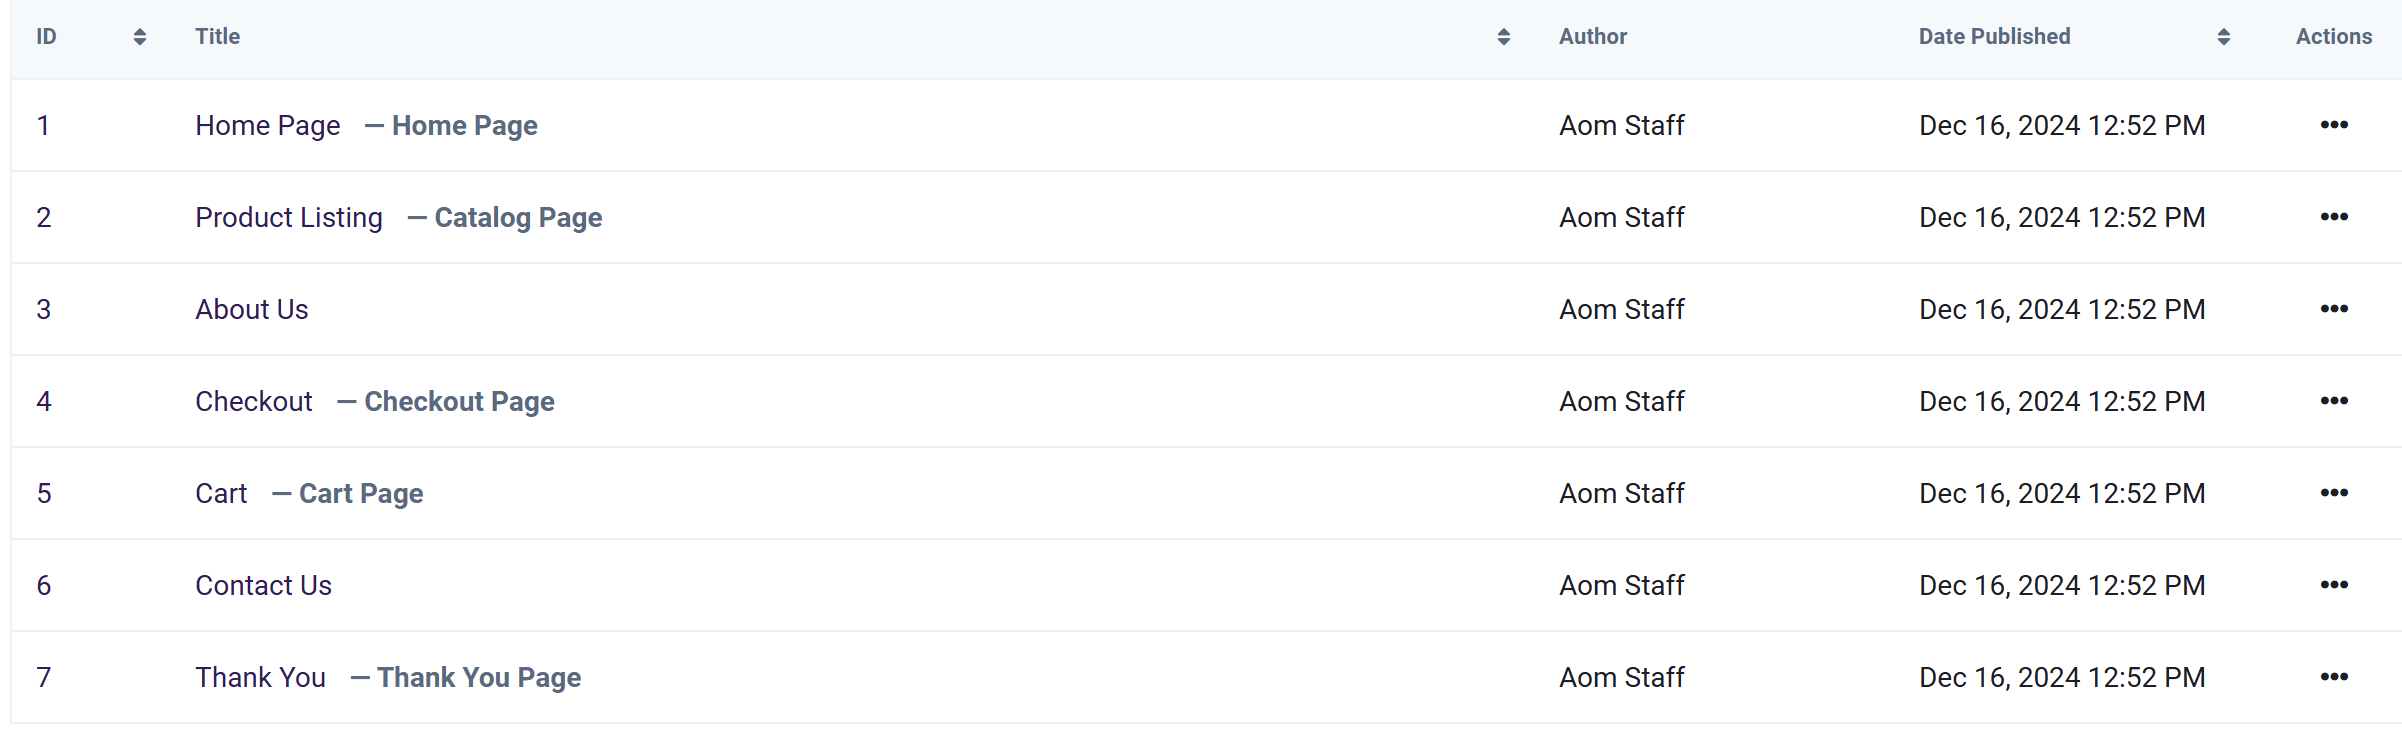
- Premade Checkout, Cart and Thankyou pages are available for use, but you have the option to create your own pages by selecting the Create Page button.
- If you chose to create a new page, you need to assign the new page in the Site Page Identification. This can be done in the dashboard at Settings > General.

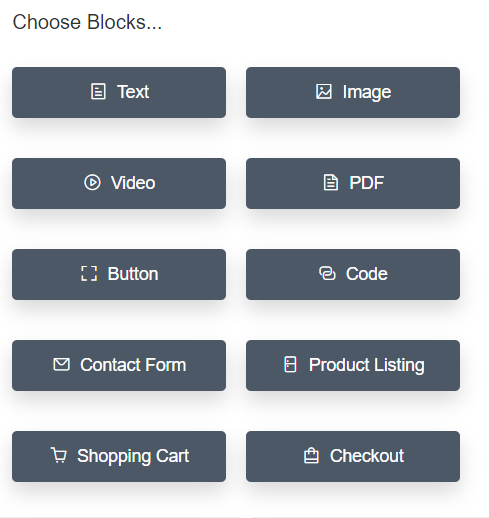
- When editing the Content area of your pages, you must include the premade block necessary for the page. There is a Checkout Component block and a Shopping Cart Component block. They are found by selecting + > Blocks.
For much more detail on how to build site pages, please see this guide: Using the Page Builder.
Next Step�
Up next, you'll want to review our guide on managing orders and invoices: